[mc4wp_form id=”2320″]
How to set up WordPress on a Raspberry Pi
WordPress is a popular open source blogging platform and content management system (CMS). It’s easy to set up and has a thriving community of developers building websites and creating themes and plugins for others to use.
Although getting hosting packages with a “one-click WordPress setup” is easy, it’s also simple to set up your own on a Linux server with only command-line access, and the Raspberry Pi is a perfect way to try it out and learn something along the way.
The four components of a commonly used web stack are Linux, Apache, MySQL, and PHP. Here’s what you need to know about each.
Linux
The Raspberry Pi runs Raspbian, which is a Linux distribution based on Debian and optimized to run well on Raspberry Pi hardware. It comes with two options to start: Desktop or Lite. The Desktop version boots to a familiar-looking desktop and comes with lots of educational software and programming tools, as well as the LibreOffice suite, Minecraft, and a web browser. The Lite version has no desktop environment, so it’s command-line only and comes with only the essential software.
This tutorial will work with either version, but if you use the Lite version you’ll have to use another computer to access your website.
Apache
Apache is a popular web server application you can install on the Raspberry Pi to serve web pages. On its own, Apache can serve static HTML files over HTTP. With additional modules, it can serve dynamic web pages using scripting languages such as PHP.
Installing Apache is very simple. Open a terminal window and type the following command:
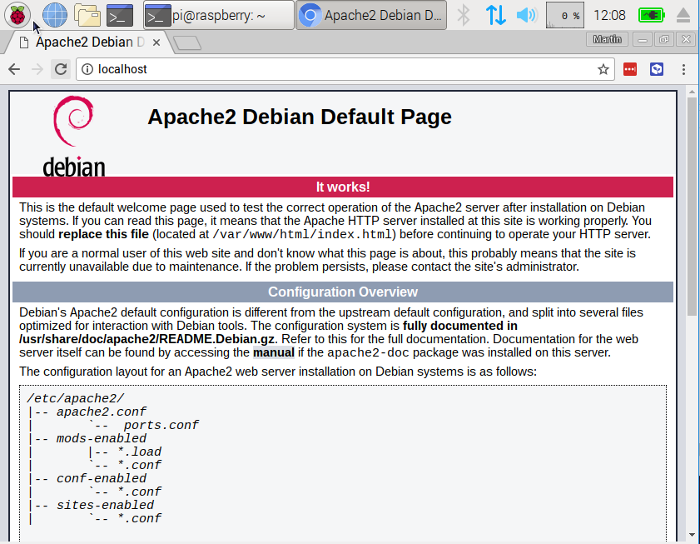
sudo apt install apache2 -yBy default, Apache puts a test HTML file in a web folder you can view from your Pi or another computer on your network. Just open the web browser and enter the address http://localhost. Alternatively (particularly if you’re using Raspbian Lite), enter the Pi’s IP address instead of localhost. You should see this in your browser window:

This means you have Apache working!
This default webpage is just an HTML file on the filesystem. It is located at /var/www/html/index.html. You can try replacing this file with some HTML of your own using the Leafpad text editor:
cd /var/www/html/
sudo leafpad index.html
Save and close Leafpad then refresh the browser to see your changes.
MySQL
MySQL (pronounced “my S-Q-L” or “my sequel”) is a popular database engine. Like PHP, it’s widely used on web servers, which is why projects like WordPress use it and why those projects are so popular.
Install MySQL Server by entering the following command into the terminal window:
sudo apt-get install mysql-server -yWordPress uses MySQL to store posts, pages, user data, and lots of other content.
PHP
PHP is a preprocessor: it’s code that runs when the server receives a request for a web page via a web browser. It works out what needs to be shown on the page, then sends that page to the browser. Unlike static HTML, PHP can show different content under different circumstances. PHP is a very popular language on the web; huge projects like Facebook and Wikipedia are written in PHP.
Install PHP and the MySQL extension:
sudo apt-get install php php-mysql -yDelete the index.html file and create index.php:
sudo rm index.html
sudo leafpad index.php
Add the following line:
<?php phpinfo(); ?>Save, exit, and refresh your browser. You’ll see the PHP status page:

WordPress
You can download WordPress from wordpress.org using the wgetcommand. Helpfully, the latest version of WordPress is always available at wordpress.org/latest.tar.gz, so you can grab it without having to look it up on the website. As I’m writing, this is version 4.9.8.
Make sure you’re in /var/www/html and delete everything in it:
cd /var/www/html/
sudo rm *
Download WordPress using wget, then extract the contents and move the WordPress files to the html directory:
sudo wget http://wordpress.org/latest.tar.gz
sudo tar xzf latest.tar.gz
sudo mv wordpress/* .
Tidy up by removing the tarball and the now-empty wordpress directory:
sudo rm -rf wordpress latest.tar.gzRunning the ls or tree -L 1 command will show the contents of a WordPress project:
.
├── index.php
├── license.txt
├── readme.html
├── wp-activate.php
├── wp-admin
├── wp-blog-header.php
├── wp-comments-post.php
├── wp-config-sample.php
├── wp-content
├── wp-cron.php
├── wp-includes
├── wp-links-opml.php
├── wp-load.php
├── wp-login.php
├── wp-mail.php
├── wp-settings.php
├── wp-signup.php
├── wp-trackback.php
└── xmlrpc.php

3 directories, 16 files
This is the source of a default WordPress installation. The files you edit to customize your installation belong in the wp-content folder.
You should now change the ownership of all these files to the Apache user:
sudo chown -R www-data: .WordPress database
To get your WordPress site set up, you need a database. This is where MySQL comes in!
Run the MySQL secure installation command in the terminal window:
sudo mysql_secure_installationYou will be asked a series of questions. There’s no password set up initially, but you should set one in the second step. Make sure you enter a password you will remember, as you’ll need it to connect to WordPress. Press Enter to say Yes to each question that follows.
When it’s complete, you will see the messages “All done!” and “Thanks for using MariaDB!”
Run mysql in the terminal window:
sudo mysql -uroot -pEnter the root password you created. You will be greeted by the message “Welcome to the MariaDB monitor.” Create the database for your WordPress installation at the MariaDB [(none)]>prompt using:
create database wordpress;Note the semicolon at the end of the statement. If the command is successful, you should see this:
Query OK, 1 row affected (0.00 sec)Grant database privileges to the root user, entering your password at the end of the statement:
GRANT ALL PRIVILEGES ON wordpress.* TO 'root'@'localhost' IDENTIFIED BY 'YOURPASSWORD';For the changes to take effect, you will need to flush the database privileges:
FLUSH PRIVILEGES;Exit the MariaDB prompt with Ctrl+D to return to the Bash shell.
WordPress configuration
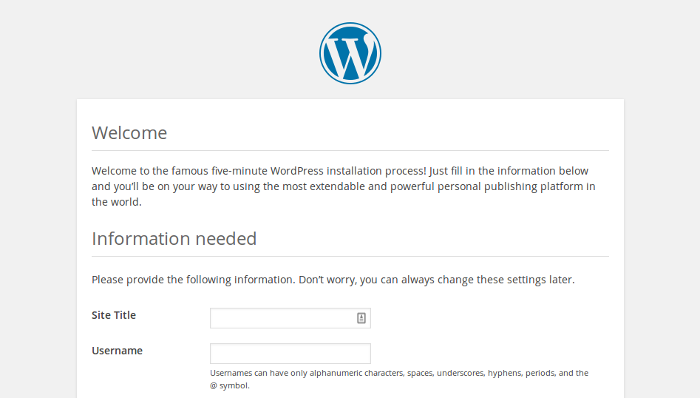
Open the web browser on your Raspberry Pi and open http://localhost. You should see a WordPress page asking you to pick your language. Select your language and click Continue. You will be presented with the WordPress welcome screen. Click the Let’s go!button.
Fill out the basic site information as follows:
Database Name:      wordpress
User Name:          root
Password:           <YOUR PASSWORD>
Database Host:      localhost
Table Prefix:       wp_
Click Submit to proceed, then click Run the install.

Fill in the form: Give your site a title, create a username and password, and enter your email address. Hit the Install WordPress button, then log in using the account you just created. Now that you’re logged in and your site is set up, you can see your website by visiting http://localhost/wp-admin.
Permalinks
It’s a good idea to change your permalink settings to make your URLs more friendly.
To do this, log into WordPress and go to the dashboard. Go to Settings, then Permalinks. Select the Post nameoption and click Save Changes. You’ll need to enable Apache’s rewrite module:
sudo a2enmod rewriteYou’ll also need to tell the virtual host serving the site to allow requests to be overwritten. Edit the Apache configuration file for your virtual host:
sudo leafpad /etc/apache2/sites-available/000-default.confAdd the following lines after line 1:
<Directory "/var/www/html">
    AllowOverride All
</Directory>
Ensure it’s within the <VirtualHost *:80>like so:
<VirtualHost *:80>
    <Directory "/var/www/html">
        AllowOverride All
    </Directory>
    ...
Save the file and exit, then restart Apache:
sudo systemctl restart apache2What’s next?
WordPress is very customizable. By clicking your site name in the WordPress banner at the top of the page (when you’re logged in), you’ll be taken to the Dashboard. From there, you can change the theme, add pages and posts, edit the menu, add plugins, and do lots more.
Here are some interesting things you can try on the Raspberry Pi’s web server.
- Add pages and posts to your website
- Install different themes from the Appearance menu
- Customize your website’s theme or create your own
- Use your web server to display useful information for people on your network
Don’t forget, the Raspberry Pi is a Linux computer. You can also follow these instructions to install WordPress on a server running Debian or Ubuntu.

